I still remember the first time I saw a live edge table that literally stopped me in my tracks.
It was in a small gallery in Vermont—a massive walnut slab, so wide that wrapping my arms around it felt impossible. The bark still whispered of the forest it came from. I ran my hand along that raw edge and thought:
This isn’t just furniture. This is a living piece of a tree.
Fifteen years later, I’ve built dozens of live edge tables—dining tables, desks, coffee tables, and statement slabs. Every piece is different. No two slabs ever look exactly the same.
And every table has taught me something.
Live edge tables have become one of the most sought-after furniture styles in modern woodworking. From rustic dining tables to contemporary office desks, the natural edge of a slab adds character that factory-made furniture simply can’t replicate.
But building a live edge table involves far more than attaching legs to a slab. If you’re new to live edge woodworking, it’s helpful to first understand what live edge wood actually is and why it has become so popular.
You can read the complete guide here: Live Edge Wood Guide.
Moisture content, slab stability, flattening techniques, crack management, and finishing methods all determine whether your table lasts decades—or warps within months.
In this complete guide, you’ll learn how to make a live edge table step by step, from choosing the right slab to applying the final finish.
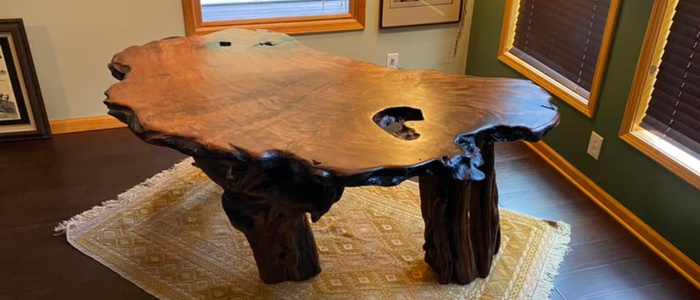
What Is a Live Edge Table?
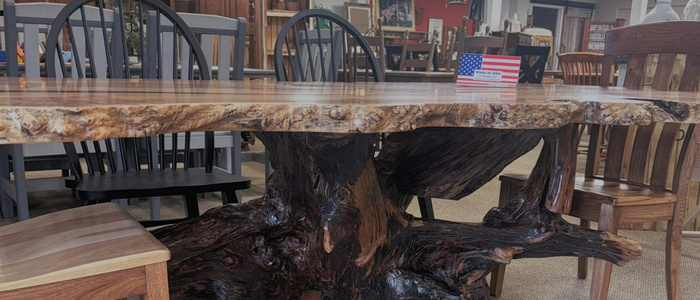
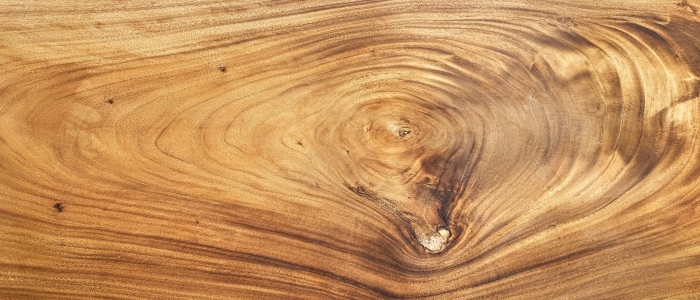
A live edge table is built from a wood slab where at least one edge preserves the natural contour of the tree.
Instead of cutting the board into straight lines, the outer edge retains the curves, knots, and organic shapes formed as the tree grew.
This design approach celebrates the natural beauty of wood:
- Natural grain patterns
- Organic shapes
- Unique knots and voids
- Irregular edges
Every live edge table is completely unique because no two trees grow the same way.
Common types of live edge tables include:
- Dining tables
- Coffee tables
- Office desks
- Conference tables
- Console tables
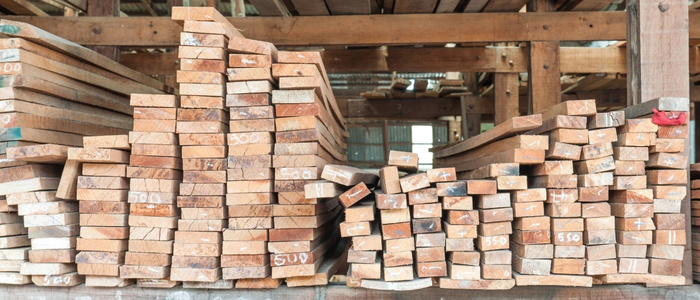
Step 1: Choosing the Right Live Edge Slab
If you’re building a live edge table, the slab you choose determines everything.
I’ve fallen in love with slabs that looked perfect on top, only to flip them over and discover cracks running all the way through.
That’s when I learned an important rule:
Never fall in love with a slab until you’ve checked the underside.
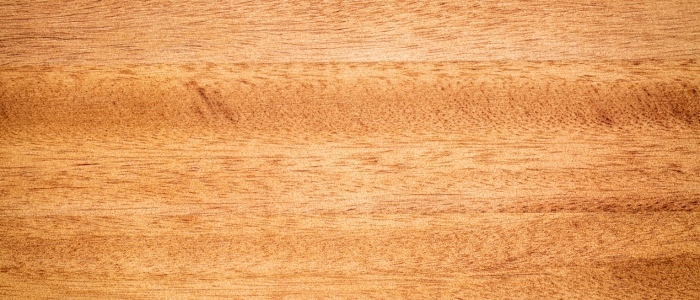
Best Wood Species for Live Edge Tables
Several hardwood species are commonly used for live edge slab tables.
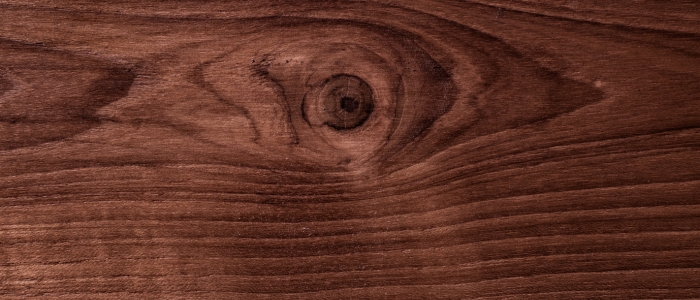
Walnut
Deep brown color with rich grain patterns. Walnut is one of the most popular woods for live edge furniture because it balances beauty, workability, and stability.
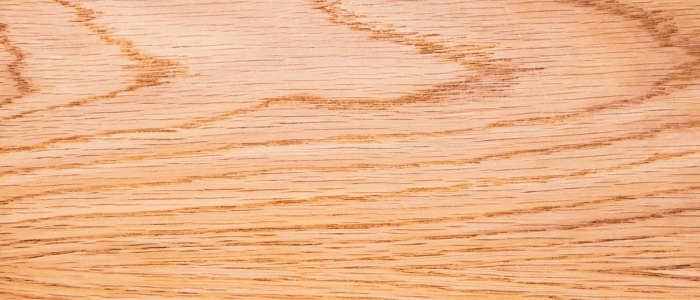
Oak
Extremely durable and strong. Oak is extremely durable and strong, making it an excellent choice for dining tables that endure daily use.
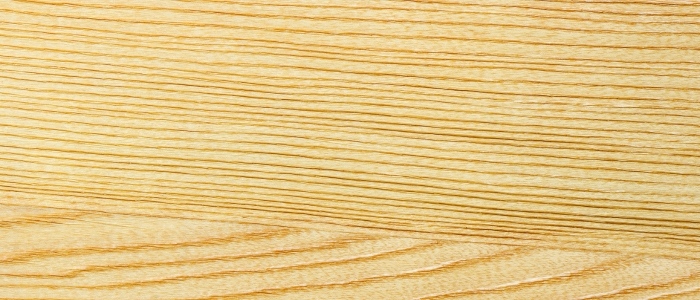
Maple
Light in color with a smooth, subtle grain pattern. Maple works particularly well in modern and minimalist interiors where clean lines and bright wood tones are preferred.
Acacia
Dense hardwood with dramatic grain patterns.
Suar / Chamchuri
A tropical hardwood known for bold grain contrasts and large slab sizes.
Ideal Slab Thickness
The thickness of your slab affects both appearance and structural stability.
Typical guidelines:
1–2 inches
Best for:
- Coffee tables
- Side tables
- Smaller furniture
2–3 inches
Ideal for:
- Dining tables
- Desks
- Work tables
3+ inches
Used for large statement pieces and conference tables.
However, thicker slabs must be properly dried to prevent internal stress and cracking.
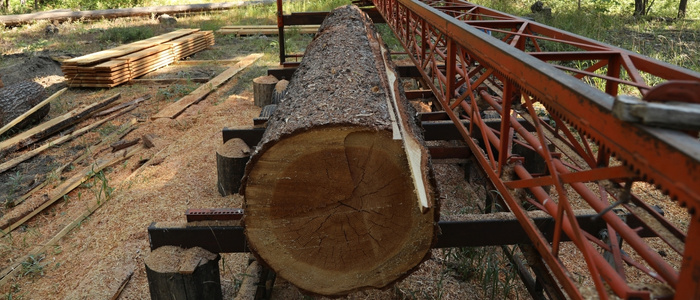
Step 2: Check the Moisture Content (The Most Overlooked Step)
If there’s one lesson every woodworker learns the hard way, it’s this:
Most live edge table failures can be traced back to one issue: wood that wasn’t properly dried.
Fresh-cut slabs may contain 30–60% moisture content.
If you build a table from wood that isn’t properly dried, several problems can occur:
- Warping
- End checking
- Deep cracks
- Joint failure
- Finish damage
For indoor furniture, the recommended moisture content is: 6–10%
Always measure moisture content with a wood moisture meter before starting your project.
If you’re unsure what happens when slabs aren’t properly dried, read this detailed guide:
Does Live Edge Wood Need to Be Dried?
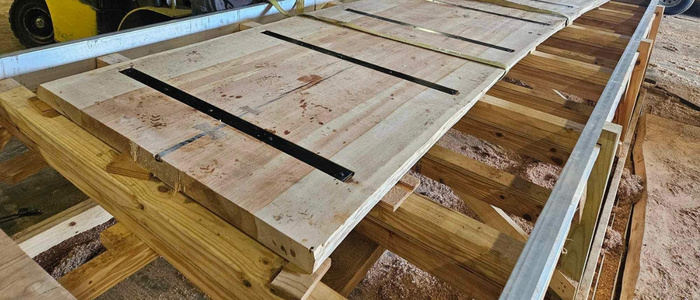
Step 3: Flatten the Live Edge Slab
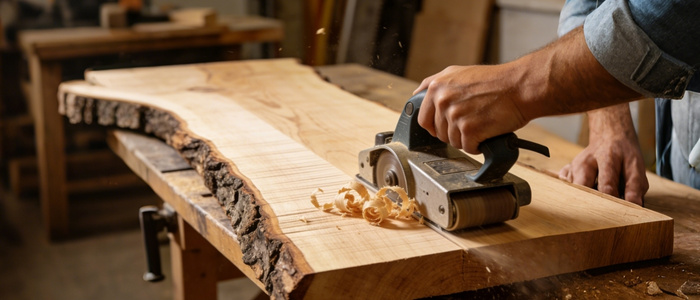
Most slabs are not perfectly flat.
As wood dries, it often develops:
- cupping
- twisting
- uneven surfaces
Before building your table, the slab must be flattened.
Method 1: Router Sled Flattening
The most common DIY method.
Steps:
- Build a flattening jig using two parallel rails.
- Mount a router on a sliding carriage.
- Move the router slowly across the slab.
- Take off a small amount of material with each pass to avoid tearing the grain.
This method works well for most home woodshops.
Method 2: CNC Flattening
Professional woodshops often use CNC machines to flatten slabs.
Advantages:
- Higher precision
- Faster surface leveling
- Less manual work
After flattening, allow the slab to rest 24–48 hours before continuing.
Wood sometimes moves slightly after machining.
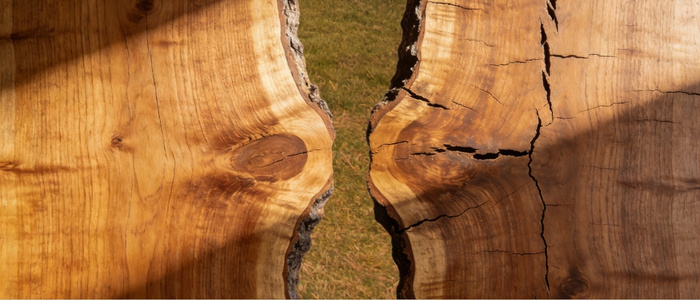
Step 4: Stabilize Cracks and Voids
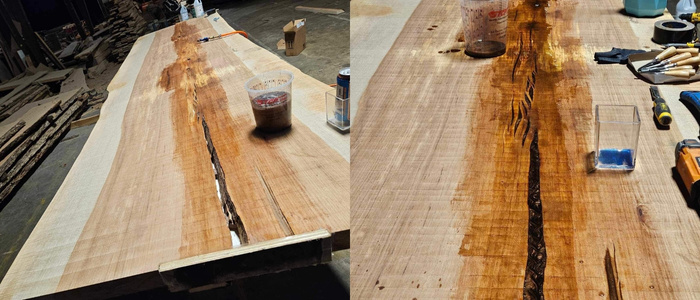
Natural slabs almost always contain imperfections:
- knots
- bark pockets
- small cracks
- natural voids
These features are part of what makes live edge furniture unique.
You have several options:
Leave Them Natural
Many woodworkers choose to keep cracks visible to preserve the character of the slab.
Fill with Clear Epoxy
Transparent epoxy stabilizes cracks while allowing the grain to remain visible.
Use Colored Epoxy Resin
Adding black or metallic pigments to epoxy can transform natural cracks into eye-catching design details.
When pouring epoxy:
- pour in thin layers
- allow each layer to cure
- remove bubbles with a heat gun
Large pours generate heat and can damage the wood if poured too thick.
Step 5: Sand the Surface Smooth
Sanding is where the wood truly reveals its beauty.
Follow a progressive sanding sequence:
80 grit → 120 grit → 180 grit → 220 grit
For ultra-smooth finishes:
220 → 320 grit
Tips for better sanding results:
- Remove dust between sanding stages
- Use consistent pressure
- Sand along the grain when possible
A useful trick is to lightly wipe the surface with a damp cloth between sanding passes.
This raises the wood fibers so they can be sanded cleanly on the next pass.
Step 6: Attach the Table Base
Attaching the legs might seem simple, but this step can cause serious problems if done incorrectly.
Wood expands and contracts as humidity changes.
If you attach the legs rigidly, the slab may crack or warp.
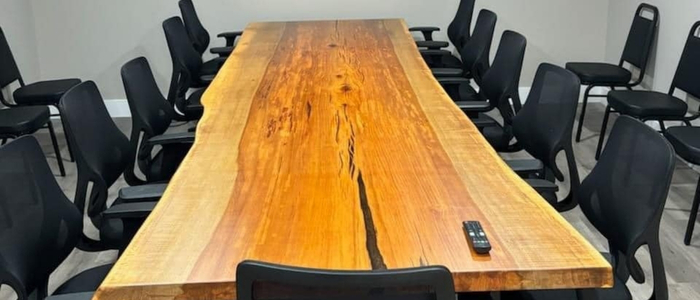
Common Live Edge Table Bases
Popular base styles include:
- Metal U-legs
- Trapezoid steel legs
- Wooden trestle bases
- Custom welded frames
- Hairpin legs
Allow Wood Movement
Use hardware that allows movement, such as:
- threaded inserts
- Z-clips
- slotted mounting holes
This allows the slab to expand and contract naturally.
Step 7: Apply the Finish
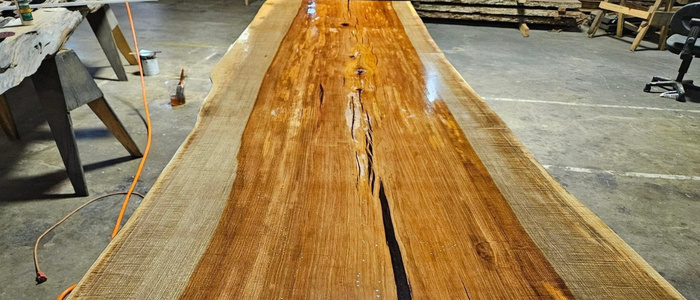
The finish protects the wood and determines the final appearance of the table.
Three common finishes are used for live edge tables.
Hardwax Oil
Advantages:
- Natural matte appearance
- Easy maintenance
- Penetrates the wood fibers
This finish preserves the natural feel of wood.
Polyurethane
Advantages:
- Very durable
- Water resistant
- Ideal for dining tables
However, polyurethane sits on top of the wood rather than penetrating it.
Epoxy Flood Coat
Creates a thick, glass-like finish.
Advantages:
- High gloss appearance
- Maximum protection
- Modern aesthetic
But epoxy significantly changes the look and feel of the wood.
Always test finishes on scrap pieces before applying them to your table. Proper drying also plays a major role in how well finishes bond with the wood surface. Slabs that still contain internal moisture often develop finish failure or uneven curing.
If you’re interested in finishing techniques, this guide explains the process step by step:
How to Finish a Live Edge Slab
Step 8: Allow Proper Curing Time
Once the finish is applied, patience is essential.
Typical curing times:
Hardwax oil: 7–14 days
Polyurethane: 3–7 days
Epoxy: 72+ hours
Using the table too soon may leave permanent marks in the finish.
How Much Does It Cost to Build a Live Edge Table?
Costs vary depending on slab size and materials.
Typical DIY budget:
Slab: $150 – $800+
Legs/Base: $50 – $300
Tools and supplies: $100 – $400
Finish materials: $20 – $100
Total estimated cost:
$300 – $1,200
Large slabs or exotic woods can cost significantly more.
Common Mistakes to Avoid
Even experienced woodworkers make mistakes when building live edge tables.
Common problems include:
Using slabs that are not properly dried
Skipping moisture testing
Not allowing wood movement
Rushing the sanding process
Applying finish coats too thick
Most failures occur because drying and stability were ignored at the beginning.
Frequently Asked Questions
From slab preparation to final curing, most projects take 2–3 weeks.
Yes. With basic woodworking tools and patience, beginners can successfully build a live edge table.
Kiln drying is recommended for slabs thicker than two inches because it stabilizes moisture and reduces cracking risk.
Walnut and oak are among the most popular choices because of their strength and attractive grain patterns.
A Final Thought
A live edge table carries more than function—it carries the history of the tree it came from.
That slab once stood in a forest, growing year after year, carrying water and sunlight through its grain.
By choosing the slab carefully, drying it properly, shaping it patiently, and finishing it with care, you’re not just building a table.
You’re continuing the story of the tree.
And when someone runs their hand along that natural edge years from now, they’ll feel it too.