Does Live Edge Wood Need to Be Dried? Yes. Live edge wood must be properly dried—slowly, patiently—before it becomes furniture. Rushing the process almost always leads to cracks, warping, or long-term instability.
This article explains why, through a very costly lesson I learned the hard way.
Why Proper Drying Matters for Live Edge Wood
Meeting the Walnut Slab
Three springs ago, I first met her in the backyard of an old logging camp.
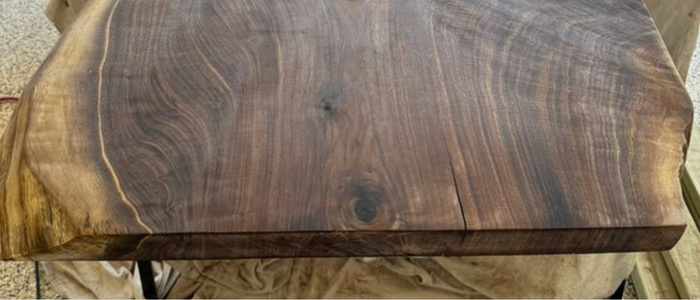
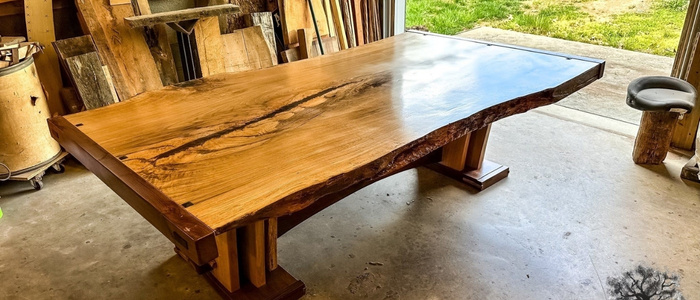
She lay among a pile of oak and pine, yet she seemed to glow—a nearly two-meter-long raw black walnut slab, its edges still marked by the weathered patterns of bark. The grain was mesmerizing: spiraling out from one end of deep brown heartwood, it transformed in the middle into a creamy-gold wave, as if an autumn river had been frozen inside the wood.
“I’m going to turn this into a dining table,” I said to Old Joe, the camp owner, pointing at her. “A table that greets guests the moment they enter.”
Old Joe wiped the sawdust off his hands and glanced at me.
“Still green. It came down from the mountain less than two months ago. It needs to dry.”
Understanding the Risks of Rushing
“How long?” I asked.
“For walnut that thick?” He said. “Old rule: one inch, one year.”
I did the math—the board was three inches thick. Three years.
“Too long,” I heard myself say. “I have a way.”
I meant kiln drying. A friend owned a small drying machine and promised, “One month, completely dry.” I thought this was modern technology triumphing over ancient wisdom.
Risks of Rushing Live Edge Wood Drying
Entering the Kiln
The day the boards went into the kiln, I checked on them daily. Watching the temperature climb and humidity drop, I felt in complete control.
Early Success and Overconfidence
Twenty days later, my friend said, “It’s ready. Moisture content is down to 12%.” I touched the board—warm, dry, like a giant cookie. Ecstasy washed over me.
The next month, I worked like a man possessed, covered in sawdust and sweat. Planing, sanding, rubbing the surface with 240, 320, and 400-grit sandpaper, over and over. The grain awakened under my fingers, and the creamy-gold “river” began to flow. I applied the first coat of Danish oil, and the wood seemed to come alive with a quiet “pop,” a deep luster radiating from every cell.
When the table was finished, I opened a bottle of wine. There it stood, in the center of my studio—a small miracle.
First Signs of Trouble
The first warning came three months later.
A hairline crack appeared slightly to the right of the center of the tabletop. I told myself it was just the wood’s “character,” part of its nature. I filled it with a little wood powder and glue—it was barely visible.
But the wood didn’t stop speaking.
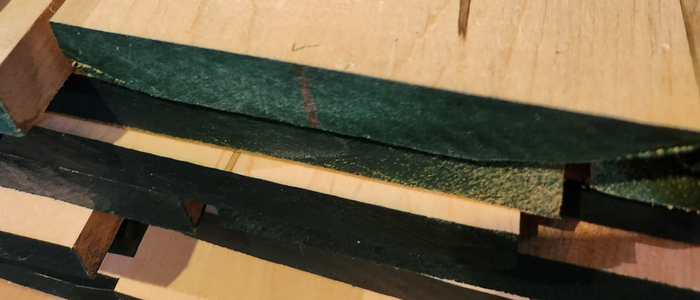
Six months later, that hairline split like lightning. Starting from an old scar at the edge, it cleaved the golden river straight toward the heart. Meanwhile, the top-right corner of the table began to rise slightly—not enough to see at a glance, but if you placed a cup on it, a quarter of the base hovered in the air.
I went to see Old Joe. He circled the table three times in silence, then laid his palm flat on the crack.
“It’s crying,” he said. “Can you hear it?”
“Crying?” I asked.
“Water,” his eyes seemed to see through everything. “The water inside hasn’t decided to leave yet.”
Learning the Hard Way
Visiting a Master Carpenter
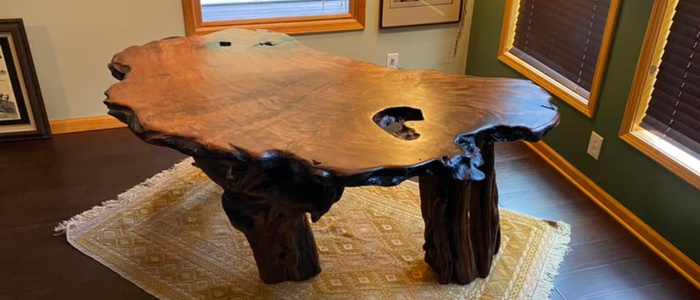
That walnut slab never became a dining table. It stood in the corner of my studio for another year, its crack like a mouth that refused to close.
But I began to learn—truly learn.
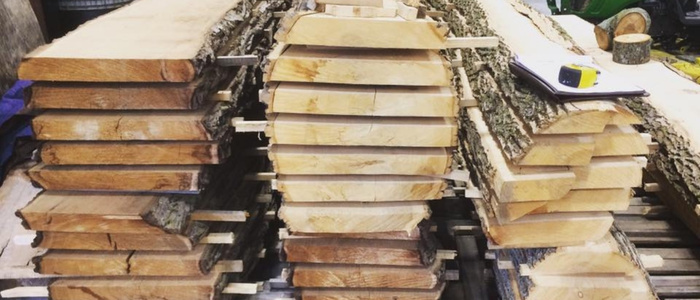
I visited Ed, a local old carpenter. His backyard resembled a timber graveyard, with dozens of planks of varying thickness laid under homemade racks, separated by neat wooden strips, like a squad of meditating warriors.
“This is called stacking,” Ed said. “Air needs to flow between each board. Give it space to breathe.”
Using a Moisture Meter Effectively
He showed me a maple plank that had been drying for two years.
“Tap it,” he said. I tapped it—clear, solid, like striking pottery.
“Now tap this one,” he pointed to a freshly arrived piece. The sound was muted, deep, like a distant drum.
“Do you hear the difference?” Ed asked. “Dry wood sings. Wet wood sighs.”
He taught me how to use a moisture meter—not just once, but at ten different points on the board, taking the highest reading.
“You must listen to the slowest part of the wood,” he said, “not the fastest.”
Listening to the Wood
From Ed, I learned that drying isn’t just a process—it’s a dialogue. Every crack, every weight change, every sound tells a story. If you want a practical, step-by-step breakdown of how live edge wood should actually be dried—from air drying to controlled kiln methods—I’ve put together a complete guide here:
Live Edge Wood Guide: Drying, Stability, and Best Practices
Patience Required for Thick Slabs
Sealing the Ends Immediately
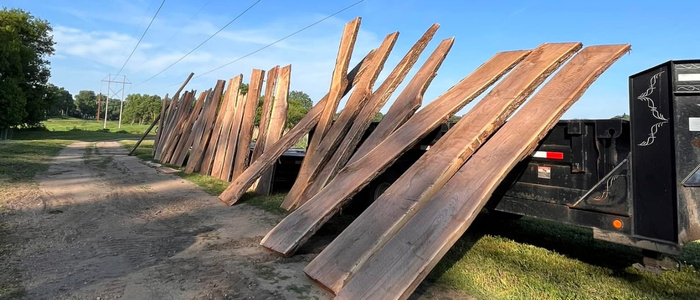
Last autumn, I acquired another fine piece—white oak, even thicker, its edges shaped like a coastline.
This time, I did three things:
Within an hour of leaving the saw, I applied a special wax coating to all cut surfaces. This slowed moisture escape from the ends, preventing sudden cracks.
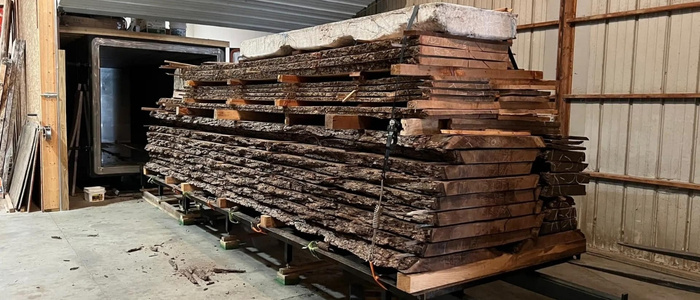
Constructing Proper Stacks
Under a ventilated carport, I stacked the boards using Ed’s method. Separated by ¾-inch strips, lined up like soldiers awaiting inspection. I weighted the stacks to prevent future warping.
Developing a Long-Term Relationship
I set a reminder in my phone—not for a month later, not a year later—but “measure again exactly two years from today.”
During this wait, I visited often. In rainy season, I touched the slightly damp surface; in dry season, I lifted it to feel it lighten. I developed a slow, silent friendship with this wood. I was no longer its conqueror, but its guardian.
Modern and Traditional Wood Drying Methods
So, back to the original question: Does a raw slab need to be dried?
My answer: No—not in the sense you think. This isn’t “drying.” It’s a rite of passage you witness and protect. You are not an engineer; you are a father clutching his fists outside the delivery room. Your role isn’t to rush, but to provide a safe, stable, respectful environment—and then wait.
Traditional Air Drying
This waiting comes with three pacts:
1. About time: Forget the calendar. Remember Ed’s words: “One inch thick, one year.” It’s not math; it’s philosophy. You’re not measuring days—you’re observing the internal storm settling. Wait for the moment the wood tells you, “I’m ready.”
2. About judgment: Buy a moisture meter, but don’t rely on it alone. Learn to listen: tap it with your knuckle, observe end-grain shrinkage, feel its weight. Data is a signpost; your senses are the compass.
3. About thick slabs: Treat thick boards like wise elders. Their moisture memory is deep; each change requires patience and care. Air drying is the long, solitary meditation they must undergo. Any acceleration must be gentle, precise, and after this meditation.
This is the pact: patience for stability, reverence for eternity.
Modern High-Frequency Vacuum Drying

Just when I believed “time is the only remedy,” I encountered real production data that challenged me.
A professional high-frequency vacuum drying facility processed a 1.5-inch walnut slab—from 55% MC down to a stable 7%—in just 10 days.
Ten days. A stark contrast to my three-year expectation.
I sent them a similar walnut board, skeptical. It emerged stable, uniform, and thoroughly dry. No cracks, no warping. Its color deepened subtly, and the grain was enhanced.
At that moment, I realized: technology provides controllable acceleration.
High-frequency heat gently warms water molecules from within; vacuum allows water to leave at low temperatures. The randomness of weather is bypassed, but the process depends entirely on the operator’s knowledge and experience.
For those curious about what a professional high-frequency vacuum drying system actually looks like in practice, this is the type of equipment I’m referring to: High-Frequency Vacuum Wood Kiln
Pre-Drying and Preparations
Yet, all rapid drying comes with prerequisites: the wood is never green; it must first experience natural pre-drying, surviving its most unstable “adolescence.” Technology merely perfects the final, delicate “rite of passage.”
This isn’t a battle of tradition versus modernity.
It’s two devotions:
- One sacrifices time to nature’s laws.
- One sacrifices knowledge and technique to physics.
And whichever path you choose, the patience and respect you bring to a slab of wood is where every story begins.
Postscript: The Walnut Table’s Story
Reconnecting the Cracked Slab
I never discarded that cracked walnut table. I rejoined it with butterfly joints, and now it serves as my study desk.
Lessons in Patience and Reverence
Each scar tells a story of patience and reverence—a lesson woodworking taught me most profoundly.
FAQ
Yes. Proper drying is essential to prevent cracks, warping, and long-term instability. Both natural air drying and controlled kiln or high-frequency vacuum drying can work, but the wood must be given time to stabilize.
A traditional guideline is roughly “one year per inch of thickness” for air drying, but this varies by species, humidity, and initial moisture content. Patience is key—rushing the process almost always leads to defects.
Yes. High-frequency vacuum drying or other controlled methods can safely accelerate the final stages of drying, but only after the slab has undergone initial natural pre-drying. Technology helps achieve uniform stability without compromising quality.
Use a moisture meter at multiple points and take the highest reading. Additionally, tap the wood to listen: dry wood “sings,” while wet wood “sighs.” Observe weight changes and end-grain shrinkage as supporting clues.
Absolutely. Sealing the cut ends immediately slows moisture loss, preventing cracks that typically form from rapid end drying. Wax or commercial end-seal products work well for this purpose.
Even after drying, thick slabs may need additional time to stabilize under indoor conditions. Always monitor moisture content and environmental changes before making the final furniture piece.