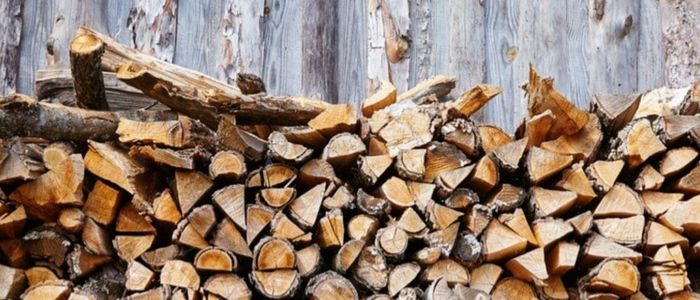
You’ve cut the wood you’ve gathered for the next woodworking project, which leaves you with a pile of rotten green wood, or you’ve bought some damp wood that’s soaked with moisture that needs drying. In any case, it’s just too humid to use, and you’ll need to dry this wood quickly before you begin any work.
This article will provide the steps to eliminate moisture from your wood to prepare for your next woodworking or furniture-making project. These important wood drying tips can significantly aid in the proper drying process quickly!
The reason you need to dry your wood prior to building using it?
Although it’s technically feasible to build using green lumber, it’s not advised as the wood quickly absorbs moisture and then loses it slowly.

A few outcomes you can expect when constructing and assembling woodworking projects using wet lumber include warped wood and ugly broken joints. If you’ve decided to purchase this or bought green lumber to start a new project, You should consider drying the lumber as a crucial element of your woodworking plan.
Before starting any task, you must determine the moisture content in your lumber. With a moisture meter, you should aim at the following levels:
- Exterior wood: A acceptable moisture content ranges from 9 and 14 percent
- Interior wood: A suitable moisture content can range from 6 to 8%
The word “near enough” isn’t enough, especially when using wood for furniture production. Be aware that different kinds of wood differ in density, for instance, hardwood vs. softwood. When you measure the amount of moisture in the lumber piece, you must set your meter to match the type of wood you’re working with.
How Long Does Lumber To Dry?
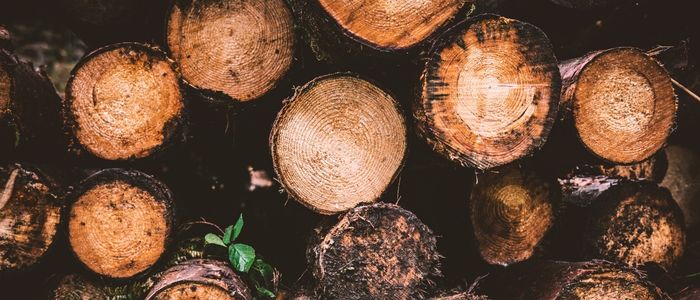
To accurately determine the drying time of any piece of wood, the following elements will need to be taken into consideration:
- The type of wood used for thickness and density
- The drying method you’ll employ to finish drying your wood
The most well-known methods, and the longest-running is air-drying wood. As environmental factors come into the equation, you’ll have to wait between 3-12 months to dry lumber.
Air-drying lumber is better for lumber used for outdoor use unless you’re trying to dry the lumber in Arizona. The average reduction in moisture content is approximately 12%-18 percent for drying air-dried wood.
Drying Wood Indoors Vs. The Outdoors
However, if you’re air drying lumber inside with a few conditions, you could accelerate the process. Utilizing an electric garage heater, a dehumidifier, and a large fan inside your backyard garage or shed can reduce drying time by as much as 60%.

One of the fastest methods to dry lumber is to use a fire to dry the wood. The outcome of drying will be determined by the thickness that the lumber. However, a piece of wood 2 inches thick typically takes about twenty hours to dry in a high-temperature kiln.
While kiln-drying wood can be rapid and requires less effort than lumber, drying wood using industrial microwave technology is still quicker.
Microware can dry lumber to the optimal moisture content for woodworking, which is 8 percent and can take days with an industrial microwave. Compare that to the drying process in kilns, which can bring about one month to reach the same moisture content.
How To Dry Wood Fastly For Woodworking
Okay, so we’ll discuss some tips for speed drying that differ from the conventional air-dry process. We’ll also go over the various methods we’ve used to reduce wood moisture quickly.
It’s essential to show you how dry the wood is needed for your work in the traditional way, the tried and true air dry method, which has been tested to dry lumber effectively.
It isn’t the fastest of wood drying methods available at the moment, but it’s undoubtedly not unfast either.
If you follow accurately, it will take only some weeks or a couple of months for the wood to dry sufficiently to be used in any woodworking job. Let’s learn the most effective method for drying their wood to use for woodworking.
Step 1: Seek (Mc) Mature Content
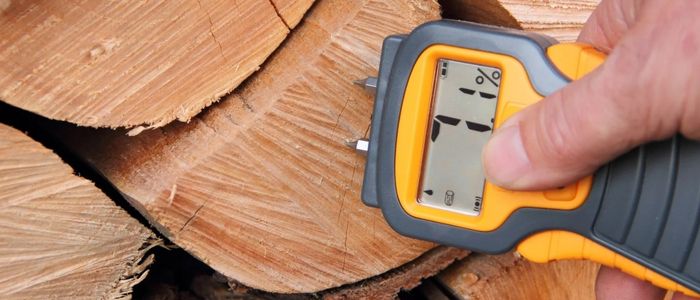
The first thing you should do is purchase the existing wood moisture gauge. The wood moisture gauge is a small instrument that we used to measure the moisture in the wood. It has two probes made of metal which you place on the wood. The science of magic can tell you how much water is present.
You’ll need to use this moisture gauge to check the moisture content within the wood. In most woodworking projects, the highest acceptable amount of moisture is 7.7%. If your wood has more great moisture content than is the case, it must be dried.
Step 2: Preparation of The Stack

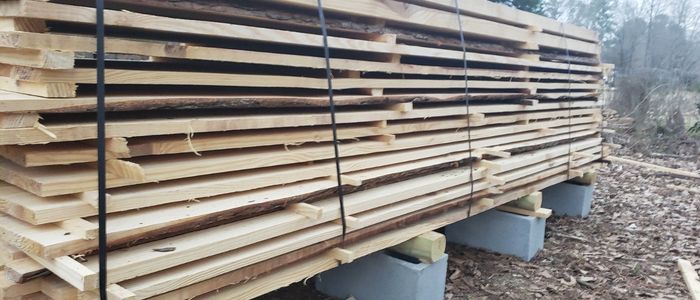
When you know that your wood has to dry, you’ll need to place an array of stickers in the dirt. They are just bits of timber that have dry, such as old 2x4s. Spread them out evenly, leaving around 16 inches between the stickers.
This will give you an elevated foundation, which means that air can reach the wood without going through the ground and ensure that water doesn’t make the wood you are trying to dry even wetter. You should ensure that you have enough stickers to cover the entire wood you’d like to dry.
Step 3: Play Your Lumber
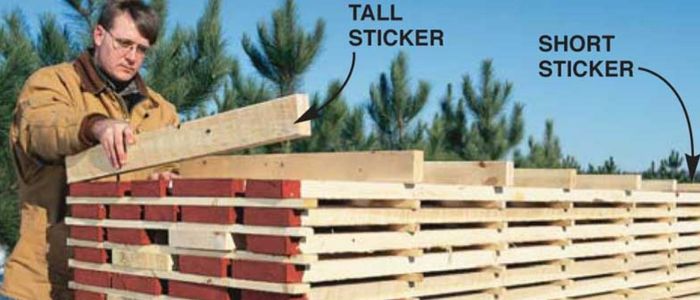
Pick the boards you wish to dry and build them up onto the stickers, starting with the top layer. Make sure the wood you’re drying is lying perpendicular to the stickers. Additionally, ensure that you leave around 1 inch of space in the middle of each wood piece.
This method can dramatically improve the airflow of every section of lumber. The more airflow you can get through the wood pile, the faster it’ll dry.
Step 4: Increase Airflow

Once you’ve made your first layer, you’ll have to apply another layer of the sticker. Keep in mind that the wooden pieces you’ve dried cannot be placed over each other, so there will be no air getting to them.
You must switch between the layers that are spaced by 16 inches and then segments of the wood drying perpendicular to the stickers spaced 1-inch distance. Sticker, wood or wood, and so and so on. It is essential to have this airflow to dry your wood, or the wood will never dry adequately.
Step 5:Weigh Down The Stack

The most important thing you should do once you’ve finished building your stack is to weigh the lumber down. And if you can put it outside, be sure to shield it from rain. This is usually done by getting the plywood lengthy sufficient to fill the entire upper part of the pile, then laying the plywood on top of the pile and adding bricks or cinderblocks, lots of them, to create pressure.
Wood can shrink as it dries, which is not ideal for woodworking projects. Therefore, you must ensure you weigh it enough so it won’t warp when it dries to prevent future damage. A piece of plywood such as this can also keep the rain away when you can place the pile outside.
Pro Tips To Improve The Process Of Drying Wood

The wood will dry faster if you’ve done it correctly and followed those steps. Be aware that the more humid and dry the air gets, the faster this process will progress, which will help to speed up drying times.
To dry any wood regardless of whether you’re trying to dry wood for firewood or more enormous stacks of wood to be used for an upcoming project it is necessary to exercise some patience.
If you adhere to the guidelines in this article, that piece of lumber you depend on for the next project will be dehydrated within a reasonable timeframe.
One method of taking advantage of the time delay associated with air-drying lumber is to dry a little more wood than you require and take the time to plan and design a different project. If you enjoy woodworking as often as we do, there’s probably another project you’re contemplating.
Dry Wood In The Indoors, If Possible

Okay, there are many places where it’s going to be very humid, and it could be raining, and the main point here is that nature can be very temperamental. Therefore, if you need to go outside, it will work perfectly, while indoors, like in a dry garage, can be even better.
This is especially the reason in the case of a heating unit in the garage since it will assist in generating dry heat. If that’s not possible and you’re interested in quickening the heating process, using a well-constructed garage heater will do excellent.
The heat in your home, when connected to your garage, can aid in speeding up your drying time. In the simplest sense, placing your drying rack inside will ensure it stays out from the elements.
Tips On How To Dry Wood Easily Outside

If you are left with no alternative to drying your wood outdoors, then you should select the right place for it. The sun is an advantage in drying lumber. The wood will dry several times faster if exposed to a lot of sunlight daily.
If you can, you can dry the stack exposed to the sunlight. It’s also beneficial to have it out in a very windy location.
The quicker the process progresses, the more sunlight and wind reach your drying rack. However, it is essential to be cautious about this, as when you live in a place that often rains, placing your wood in an open space will slow down the process.
If you’re anticipating lots of rain, ensure you keep your wood covered in a place where it will not be soaked. If that’s not feasible, then at the very minimum, you must utilize a high-quality waterproof trap to safeguard your lumber from rain.
Use A Dehumidifier And Fan For Drying Air
If you want to speed up the result, consider using an old dehumidifier. This will only work when drying your wood inside; however, if you’re in the process of drying your wood outdoors, then the dehumidifier could be an excellent option.
All you need to do is used an excellent dehumidifier on top of the pile of wood to dry and let it run, pulling the moisture from the wood. This will speed up drying time from weeks or months to a matter of days. The best option is to include an air compressor to create additional airflow.
Utilizing a dehumidifier and an air-drying fan with high volume for wooden flooring is something you should consider if you’re looking to have your wood dry quickly.
If you need more time to employ the traditional method of drying wood, like air drying, because of time constraints and project deadlines, it is a great alternative to think about for your season’s wood.
Kiln Drying Wood

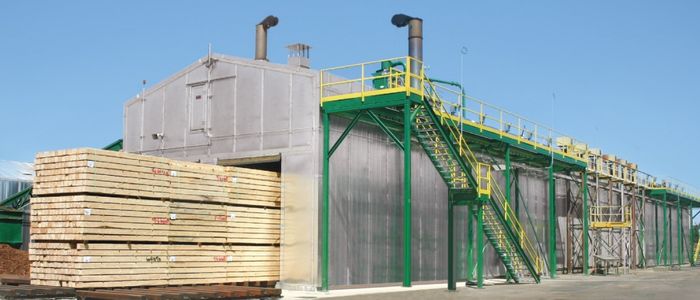
If you possess a brick kiln in case the bits of wood you would like to dry aren’t too big, then you can take it to the kiln and dry it.
It’s possible to go from dry to wet wood in just a few hours. Kiln-dried lumber is a drying method that is more efficient than air-drying lumber because it can be controlled in both humidity and temperature and the amount of steam.
If you don’t have access to wood drying in a kiln but have money to spend, you can do a quick Google search of “kiln drying dry wood close to my location,” which will direct you in the right direction. It will drastically reduce drying time for your lumber.
CONCLUSION
This is it, Folks; some great suggestions and methods of drying wood quickly to use in woodworking. Remember, no matter what you do, be sure the wood is at most 8% water content. When you reach the desired level of wood moisture, the wood is now ready for use, and you can begin to make gorgeous wood crafts without problems that could arise due to unnatural water content in the wood.
If you are still looking on how to start your own wood drying business or you want to dry your wood for personal use, we at Shuowei are extending our hand to help those individual to start their own journey in wood drying industry. If you have any questions, you can contact us.

